


Guide is just about done now.
When the EQ is defeated, Arks Level increases. When it increases, everyone will get huge HP boost and PP regen, making the entire EQ somewhat trivial for later attempts.
Arks Level 2 occurs at 50%. Level 3 occurs at 100%.
Note that throughout this battle, Weak Bullet's multiplication value is nerfed to x1.2, and its affect will be blue instead of red.
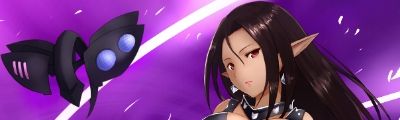
Dark Falz Double:
Fairly straightforward boss fight. Travel PAs are very, very helpful here.
There is no loot gem after Double, so save your 250% for Darkness.
Dark Falz Double is vulnerable to Panic, which will cause a unique stun.
General Strategy:
Double always starts out with 3-5 stomps towards the multi. It will then randomly pick from one of the attacks listed below.
Two "leg" towers will light up with red hoops. These will have glowing red balls sticking out of them. Focus on attacking these.
The easiest way to figure out which towers to attack is to simply cycle lock-on.
Damage on these will seem low, because they don't have "weak point" multipliers.
Note that attacking the balls can be difficult because the towers move a lot.
The safest time to attack is when they tilt forwards on an angle. They will stay tilted for a lengthy amount of time.
Once two red balls are destroyed, the center tower will open its mouth and stick out its tongue with a glowing red ball on the end.
When two of Double's leg towers have been broken, it will always emit a whiny cry, which is a good notification that the tongue is revealed
The tongue will be revealed for a long amount of time. Deal as much damage to this as you can.
When you reach damage threshold, Double will retract the tongue and repeat the tower ball phase.
If Double's leg towers aren't broken in time and it reveals others, damage carries over when they re-open later.
After the tongue is retracted a second time, Double will always fly away and do two charges.
At this point you can completely avoid both charges by standing in the corner 4 tiles of the map.
After the second charge, Double will always try to stomp on players. Avoid the circles on the floor.
When Double returns, it will repeat the tower ball phase. When the tongue is retracted for a third time, Double will enter its final phase.
The final phase will reveal the tongue, and Double will usually spit out some cars from the central tower.
It will still use its spin attack and occasionally jump into the sky, or jump to the sides of the map.
Watch out for cars converging upon the entire multi.
Double's Attacks:
- Towers will wind up and then spin. Watch for the wind up and move away. Notice that the spin increases in range, meaning you need to stand further back than the initial range, or you will get hit.
- Towers will move backwards, and then swing forwards.
- Double may lift towers and then bring them down to stomp on players. Stomps can be avoided by avoiding the glowing red circles on the ground.
- The central tower may spit out toy cars and flying toy robots that circle around the map, leaving pools that inflict Panic.
- Toy cars will drive towards players. They can be dangerous if many players are gathered in a single spot.
- Toy robots always follow the red circle trails. Simply don't stand on the red circles.
- Double will hop a short distance away. It will then hop further away and line up in a row, shoot a set of lasers from each tower, then split up again. This tends to be over very quickly.
- Double will hop a medium distance away (usually towards the side of the map). It will then line up on the side of the map and fire two sets of walls at the players. You can step dash through them.
- These walls have a gate to run through, but the easiest way is to hug Double as soon as the towers line up.
- Double's tower legs will tilt forward, and then rotate slowly. There are always toy robots and cars during this.
- Double's energy attacks (eg. the pools, the lasers) can inflict panic. If you get panicked, you can still use lock-on and travel PAs to get to targets quickly.
Class Strategy:
- Casters should stay in the center of the towers, for best range positioning.
- Il Barta is the Tech of choice for damage here. Use Barantsion when it's up, but make sure you won't get interrupted. If you think the ball will retract in mid-cast, save it for later.
- If you have Techer's Super Treatment skill, you can intentionally stand in the red pools to get debuffed with Panic, and then Anti yourself for faster PP regeneration.
- Massive Hunter can be useful for preventing interruptions, particularly when there are lots of cars/robots flying about, or during the final phase.
Profound Darkness:
Profound Darkness is also reportedly vulnerable to Panic, which will cause a unique stun.
Note that some of Profound Darkness' attacks may inflict Bind debuff (golden electrical effect). You won't be able to move, but can still attack.
Profound Darkness is considered a DA and not a regular Darker, thus Ultimate Buster works on it.
Phase 1:
Darkness will fly around from one side of the map to another. When it's within range, it'll reveal one attackable section.
These can be broken, and Darkness will rotate itself to reveal different sections.
Breaking three of these sections will cause Darkness to reveal its core, so prioritize unbroken parts if you can.
After enough damage is done, it will simultaneously reveal two attackable sections instead.
With each retreat and return, these sections individually change shape into different attacks.
Watch for the shape to know what kind of attack it will be.
Sometimes, walls will spawn ala Mining Base: Despair. Destroy these as soon as possible.
WB applied to the wall seems to be the full version (ie. the effect is red instead of blue).
Section types/attacks:
- Claw-like hole. Will periodically open to detonate an AOE explosion attack. Sometimes extends to strike the multi? Can suck people up before using the explosion.
- Two hooks. These will extend and slam around the map. They won't hit you if you're hugging Darkness.
- A-shaped with crab-like red pincers. This will extend, grabbing multiple players and slamming them. Just dodge it when it comes out.
- A whitish eyeball shield. This shoots energy spheres that seem to home-in on players, as well as shooting mini lasers.
In addition to the above, Profound Darkness also has these attacks:
- Darkness will fly near the map, and charges the long tail-like section of its body before swiping across the entire map. This attack can come from either the left or right. Watch for the glowing tail.
- Darkness will fly above the map and then drill downwards. You can hit the body very briefly as it retracts from this attack.
- Darkness will fly far away, pause, collect glowing energy into its "petals" and then charge through the multi. You can see this coming and dodge it.
- Darkness will fly far off into the distance and circle the map, knocking asteroids into the map ala Dark Falz Elder. These will be marked by red circles on the floor. Avoid these circles to be safe.
- Darkness will seemingly drop off the map and then charge straight down through the multi from above.
- Darkness will fly above the map and shoot pillars of energy down onto the floor.
After dealing significant amounts of damage, Darkness will show its huge glowing white core for about 7 seconds.
Phase 2:
After enough damage is dealt, the background will turn white and Darkness' petal-like extensions will turn black-red.
Many lightning whirlwinds will spawn around the map. Avoid these. Walls may still randomly spawn.
Darkness will continue to use the same attacks as Phase 1.
When Darkness moves close to the map, it will either reveal three attackable sections, or two sections on the left/right and a glowing white ball in the center.
These sections will use the same attacks as part 1. If you see the glowing white ball, it will shoot a huge laser cannon. But don't worry, as it won't do much damage.
Again, breaking three of these sections will cause Darkness to reveal its core, so prioritize unbroken parts if you can.
Simply keep attacking the two attackable sections.
Note that when the white ball is in the center, Darkness will hover left and right, making the sections move out of range of melee.
Melee may have to switch between the two targets.
After dealing significant amounts of damage, Darkness will again show its huge glowing white core for about 7 seconds.
Phase 3:
Darkness will sprout a burly winged gold-armored man with a tinny high-pitched voice that tells the multi they cannot escape and will die.
Sometimes, Darkness will change to this form without the cutscene and open with an attack, so be warned.
Attackable points:
Face (primary weak point), hands/arms, chest.
Attacks:
- Swings one arm after another, sometimes 2-4 times with varied timing (saying "shi ne", "nigasan"), and then finishes with a large map-wide double fist slam attack (saying "ochiro").
- Uses one arm to grip the floor, whilst the other arm will shoot lasers and stuff at the multi. Clinging to the side of the map next to the arm seems to be a somewhat safe spot, although you will still get hit.
- Uses both palms to create a vortex to suck players in, which detonates into huge explosions that should be avoided.
Darkness will spawn about 15-20 flying balls. These will fly around the map, shooting lasers and such.
As soon as these are destroyed, he will be stunned and faceplant into the floor, allowing players to attack his face for about 8 seconds.
Phase 4:
Darkness will fly away and charge a red Spirit Ball. The player will then be teleported away to fight Persona alone.
Persona has various attacks, and some of them stun, so be ready to shake out ASAP.
Attacks/Abilities:
- Over End. Note that it won't always end in the overhead slash, and may have a follow up horizontal slash after.
- Satellite Cannon-ish geysers, sometimes multiple in a row.
- Throws a huge ball of energy, sometimes multiple in a row.
- Will dash through the player, removing lock on.
The multi has roughly 30 seconds to defeat Persona.
Damage and Weak Bullet to Persona are shared throughout the multi. Chain Trigger is shared between party members.
If the multi does not defeat Persona in time, Persona will use a ~999999 damage attack (may start with Persona saying "nigasan").
This may be dodgable, or survivable via Never Give Up or Photon Blast.
Phase 5:
Once Persona is or isn't defeated, the multi will all be teleported back to Darkness.
If you successfully dealt enough damage to Persona, Darkness will have a headache and crash into the ship.
This causes him to faceplant and open his mouth, allowing the multi to deal massive damage for roughly 11 seconds.
If Persona was not defeated in time, Darkness will keep his chin to the floor and arms to the side of the map.
He will then use AOE attacks repeatedly, including scrolling lasers and other explosions, while moving his face in and out of attack range.
Simply hug his face and most of the attacks will likely miss. Keep attacking his face.
When enough damage is dealt, he will faceplant and open his mouth similar to had Persona been defeated.
Now is a good time to use 250% rare drop.
Unsorted points:
- When PD's breakable parts are panicked, they will be unable to attack
- PD's double hook breakable part can shoot a slicing projectile
- When there are multiple crab pincers on both sides, they can grab people on the opposite side of the map, and they can also grab people who've just been grabbed (double slam)
- PD can also rain small energy balls, which are preceded by small circles on the ground
- You can still get hit by rocks hitting the floor even if you are not standing in the red circles. To avoid this, you must avoid standing parallel to PD's flight (ie. stand at a side angle to the circles).
- Damage to PD's breakable parts carry over to the next phase
- In general, remember the shape of PD's breakable parts, and keep attacking the ones you feel have taken most damage, so as to cause breaks
- Sometimes PD glitches and flies through the floor, this can be a huge pain if it's revealing its core and positions itself opposite everyone
- PD must reach certain damage threshold or it won't change forms/summon Persona.
- PD can only summon Persona after Xiao's notice and after certain points, such as after it's been stunned, or after it lifts its hand from the floor
- PD will always do the suck-in energy pillars on second spawning of small eyeballs
- PD has a rare attack where it will fly above the multi and shoot both the breakable parts and lasers down at the multi from above.
The End:
Players end up in a pretty flower field with invisible walls. Enjoy your phat loots.
Notable drops:
- Mothership-themed stuff (the black and teal 11 stars).
- Nox-themed stuff
- Toy-themed weapons nobody cares about
- Granfol (the crit latent 11 star Dual Blades that drop from rare Bal Lodos)
- Dio prefix 10 star stuff
- Traitor Cage (the melee latent wand)
- Invade 13 stars (latent seems to be +15-+25% crit)
- Invade 11 star unit set (Rear+Arm 2 piece set bonus, Leg+Invade Weapon 2 piece set bonus)
- Austere 13 stars (latent seems to be +damage +pp regen)
Total of roughly 30 cubes with a +250% rare drop ticket.
Big thanks to everyone contributing information in this thread and the one in general forum.

 Reply With Quote


Connect With Us