| Introduction |
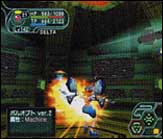
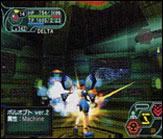
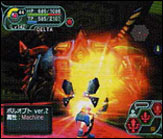
The battle involves two phases. The first phase of Vol Opt involves totems
and monitors while in the second phase, you face Vol Opt head to head.
Note that numbers are online#/offline# where applicable. |
|
| Attacks |
| Gizonde Totem Attack |
|
Foie Totem Attack |
|
|
Attribute |
Technique
|
|
|
Attribute |
Technique
|
| Difficulty |
ATP
|
Difficulty |
ATP
|
| N |
56/48
|
N |
--
|
| H |
112/70
|
H |
--
|
| VH |
240/134
|
VH |
--
|
| ULT |
460/420
|
ULT |
527/457
|
|
| Gibarta Totem Attack |
|
Homing Missiles |
|
|
Attribute |
Technique
|
|
|
Attribute |
None
|
| Difficulty |
ATP
|
Difficulty |
ATP
|
| N |
--
|
N |
54/30
|
| H |
--
|
H |
136/60
|
| VH |
--
|
VH |
170/154
|
| ULT |
489/389
|
ULT |
620/460
|
|
| Pressing Pillar |
|
Laser |
|
|
Attribute |
None
|
|
|
Attribute |
None
|
| Difficulty |
ATP
|
Difficulty |
ATP
|
| N |
104/66
|
N |
151/86
|
| H |
220/140
|
H |
260/164
|
| VH |
300/200
|
VH |
440/244
|
| ULT |
740/560
|
ULT |
2000/740
|
|
| Heal |
|
|
|
|
Attribute |
None
|
|
|
|
|
| Difficulty |
ATP
|
|
|
| N |
40/16
|
|
|
| H |
80/40
|
|
|
| VH |
160/80
|
|
|
| ULT |
2000/900
|
|
|
|
|
| Patterns |
| Vol Opt Phase 1 |
| Monitor -› Totems -› Gizonde |
|
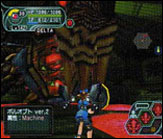
| Vol Opt (ver 2) Phase 1 |
| Monitor -› Totems -› Random(Gizonde, Gibarta, Foie) |
|
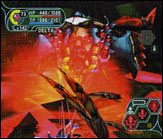
| Vol Opt Phase 2 |
| Homing Missiles -› Pressing Pillar x 2 -› Heal -› Laser |
|
| Vol Opt (ver 2) Phase 2 |
| Random(Homing Missiles, Heat, Pressing Pillar, Random Pressing Pillar,
Laser) |
|
| Stats |
|
1st Form : Core
|
|
1st Form : Big Monitor
|
|
1st Form : Small Monitor
|
| Difficulty |
HP
|
Difficulty |
HP
|
Difficulty |
HP
|
| N |
3500/2400
|
N |
420/370
|
N |
350/300
|
| H |
5500/3500
|
H |
650/420
|
H |
500/350
|
| VH |
12000/5500
|
VH |
1400/600
|
VH |
1100/500
|
| ULT |
18000/12500
|
ULT |
3600/2700
|
ULT |
2400/1800
|
|
1st Form : Monitors
|
| Difficulty |
DFP
|
EVP
|
EFR
|
EIC
|
ETH
|
ELT
|
| N |
80/70
|
60/50
|
30
|
30
|
15
|
30
|
| H |
170/140
|
80
|
30
|
30
|
15
|
30
|
| VH |
300/250
|
100
|
30
|
30
|
15
|
30
|
| ULT |
1550/1200
|
890/840
|
80/70
|
95/90
|
95/90
|
80/65
|
|
1st Form : Pillar
|
| Difficulty |
HP
|
DFP
|
EVP
|
EFR
|
EIC
|
ETH
|
ELT
|
| N |
500
|
80/70
|
40
|
35/30
|
35/30
|
15
|
35/30
|
| H |
850/500
|
70/100
|
70
|
35
|
35
|
15
|
35
|
| VH |
3000/700
|
330/250
|
200/100
|
40
|
40
|
15
|
40
|
| ULT |
3000
|
1550/1200
|
890/840
|
90
|
90
|
65/50
|
80/65
|
|
1st Form : Lightning Rod
|
| Difficulty |
HP
|
DFP
|
EVP
|
EFR
|
EIC
|
ETH
|
ELT
|
| N |
450/180
|
40/0
|
70
|
0
|
0
|
100
|
0
|
| H |
700/350
|
100
|
120
|
0
|
0
|
100
|
0
|
| VH |
950/500
|
150
|
150
|
0
|
0
|
100
|
0
|
| ULT |
1350/1150
|
1500/1200
|
890/840
|
60
|
70
|
80
|
60/45
|
|
2nd Form
|
| Difficulty |
HP
|
DFP
|
EVP
|
LCK
|
EFR
|
EIC
|
ETH
|
ELT
|
EXP
|
| N |
7400/4300
|
120
|
115
|
5
|
60/50
|
45/35
|
20/15
|
40/30
|
1100
|
| H |
13000/6000
|
200
|
140
|
5
|
60
|
45
|
20
|
50
|
3000
|
| VH |
26000/8500
|
360/280
|
170
|
5
|
60
|
45
|
20
|
50
|
5300
|
| ULT |
30500/21500
|
1700/1250
|
890/840
|
5
|
90/70
|
85/55
|
100
|
80/65
|
7500
|
|
|

 Printer Friendly Version
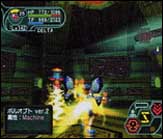

Connect With Us