
| Quest: | Phantasmal World #2 |
| Description: | Vast numbers of monsters have appeared on Gal Da Val Island. Destroy them. |
| Client: | Principal |
| Reward: | Meseta (Depends on difficulty) |
| Prerequisites: | None |
| Overview: | Like Phantasmal World #1, the goal for this quest is to activate the security consoles at the end of Mountain and Central Control Area. The last room for each area features numerous waves of enemies and a unique camera view. You start out in the Central Control Area, but a large door blocks your path. To lower it, you will have to activate the security console in Mountain first. After that, proceed through the Central Control Area and activate the security console at the end of it. Once both areas have been cleared, warp back to Pioneer 2 and talk to the Principal. Also, be sure to talk to Nol to receive your Lucky Coins. The number of Lucky Coins you receive will be based on the difficulty level. On Normal through Very Hard, you will only receive one Lucky Coin for completing the quest. For Ultimate, the number of coins you receive will be equal to the number of players in your team. |
| Maps |
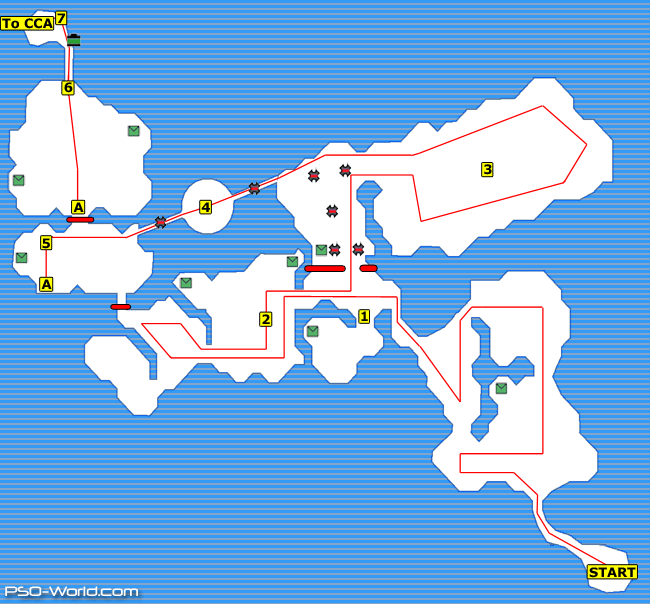
 About These Maps About These MapsOn the maps below, the path the player should take is denoted by a red line. Doors and laser fences that are opened by pressing a button are also marked. Please note that switches are represented with circles and fences/doors with ellipsoids. Colors are used to indicate which switch opens which door/fence. Doors/fences that are opened as a result of clearing the room of enemies are not marked. Since it would be impractical to label every single box, a green box is used to denote a group of boxes in certain places. Finally, damage, confuse, slow, and shock traps are denoted using a generic Damage Trap icon. Claw and laser fence traps receive their own icons due to their unique nature. Like the box icon, a single trap icon may denote multiple traps of the same type. |
| Central Control Area |
|
Walkthrough
|
| Mountain |
|
Walkthrough
|
| Enemy Counts |
| Enemy | Mountain | CCA | Grand Total |
| Merillia | 26 | 23 | 49 |
| Meriltas | 23 | 22 | 45 |
| Ul Gibbon | 52 | 61 | 113 |
| Zol Gibbon | 10 | 16 | 26 |
| Gibbles | 9 | 0 | 9 |
| Gee | 40 | 40 | 80 |
| Sinow Berill | 7 | 16 | 23 |
| Sinow Spigell | 0 | 9 | 9 |
| Guide by Ryna. Special thanks goes to Tycho for the enemy counts and psobsesser for helping with runs. |
 Printer Friendly Version
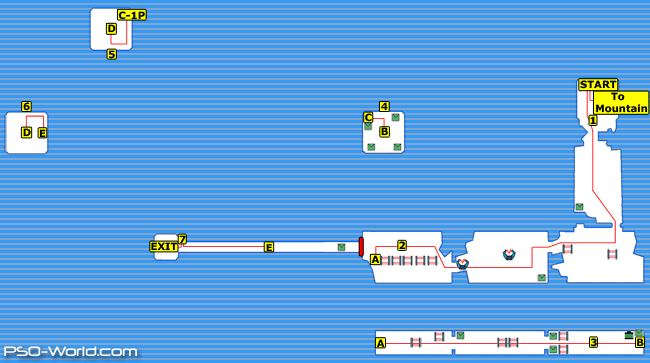
Connect With Us