| Quest: | Dangerous Deal with Black Paper |
| Description: | Unknown |
| Client: | Black Paper |
| Reward: | An assortment of items if the quest is completed succesfully. |
| Prerequisites: | You will need a Photon Crystal. |
| Overview: | The idea behind this single-player quest is that you
can exchange a Photon Crystal to fight in an arena against a specified
set of opponents for the chance to win fabulous prizes. The items that
you can win from this quest are among the rarest on Phantasy Star
Online. You will start on Pioneer 2. Talk to the blonde-haired RAmar standing outside the Guild area. He will ask for you to present a Photon Crystal and to make space in your inventory. Once you've freed up some space, talk to him and you will be teleported to Crater North. There, you will meet Sue and an assistant. Talk to Sue for information about the quest. Your Photon Crystal will then be inserted into a server. Next, approach the terminal corresponding to the route that you want to play (Sand Rappy, Zu, or Dorphon). You will be taken to a secluded area ringed by cactii. Inside the "battle arena," you will have 10 minutes to eliminate several waves of enemies that are consistent with the route you chose. If you die or time runs out, you will fail the quest. Please note that enemies do not drop anything. Once you've finished killing the enemies, you will receive an assortment of items based on the route you chose and difficulty level. It is speculated that your clear time has an impact on the item selection too. You can find a list of winnable items at the end of this guide. The items that you won will appear near the near the exit warp. If you accidently take the warp without picking up the items, Sue can teleport you back to the arena. Once you are done, talk to Sue and select the choice to warp back to Pioneer 2. Talk to the lady at the guild counter to exit the quest. Helpful Tips
|
| Maps |
 About
These Maps About
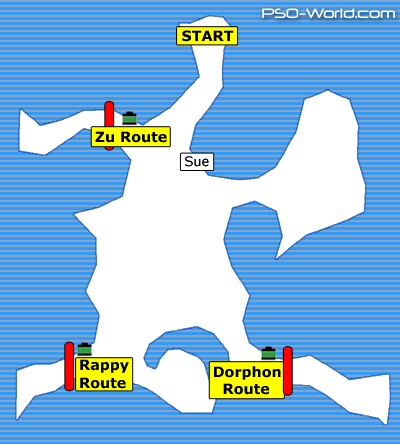
These MapsUnlike most quest walkthroughs, this guide will not outline the path the player should take since it will vary based on the route. If you get lost, look over the walkthrough notes and quest description. The legend to the right will explain the icons used on the maps below. |
| Crater North |
 |
Walkthrough Talk to Sue and choose the route that you want to take. Approach the terminal corresponding to the selection you made. Once you've finish clearing the route, talk to Sue to be teleported back to Pioneer 2. |
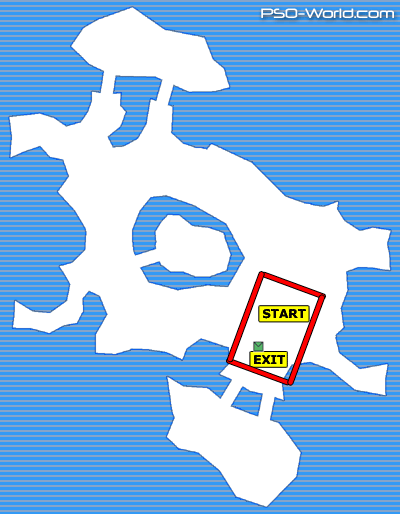
| Rappy Route |
 |
Walkthrough The Sand Rappies will fall in circles around you. Kill one, run out of the circle, and switch to a group weapon. If you are using a Force, you can stay put and spam magic. However, try to use as many magic boosts as possible if you use this strategry. If you are using a hunter, bring a strong Sword (or Partisan) and strong one-on-one weapon. Confuse and freeze traps will work well if you are using an android. This route has approximately 60 Rappies. |
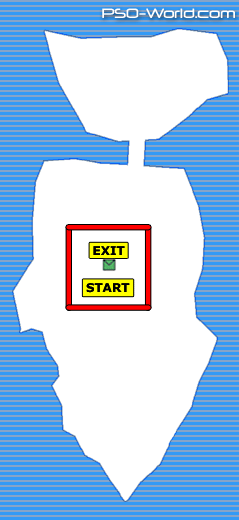
| Zu Route |
 |
Walkthrough Forces should spam Barta or Rabarta when multiple Zu spawn. Switch to Zonde to take out the Pazuzu. If you are using a Ranger or Hunter, use mechguns with hit percentage. A weapon with Demon also works well here. Traps are almost useless. This route has approximately 15 Zu. |
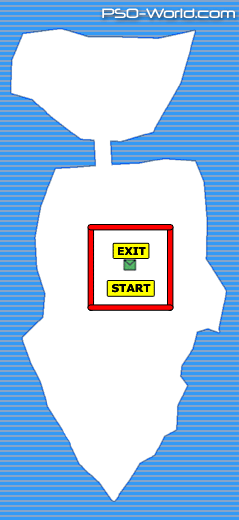
| Dorphon Route |
 |
Walkthrough Forces should spam Gifoie to stop a Dorphon charge. After that, alternate between using Resta and Foie (Rafoie in the case of multiple spawns). Gifoie also works well for Rangers to stop the initial charge. Beyond that, you'll need a weapon with Demon and Mechguns to finish off each Dorphon. Hunters should Mechguns or Twin Saber-type weapons. Androids can spam fire traps to stopy a rushing Dorphon. It will work once-in-a-while. A Dorphon Eclair can do over 1000 damage, so try to stay at full health. If you do not deal with it quickly, the Eclair will start using Grants. If you have over 60 ELT, you will take 200+ damage three times since you will probably not fall down. An Eclair will usually follow up with a rushing attack (800+ damage) after casting Grants. Keep an eye out for the enemy spawn that has three Dorphon in it. This route has approximately 12 Dorphons. |
| Winnable Items |
| If
you clear a route successfully, you will have the chance to receive an
assortment of items (including meseta). The assortment you receive will be
randomly generated from a list of winnable items. As such, there is no
guarantee that you will receive a specific item. The weapons you
receive will be untekked with no percentages. Armors and frames will
have minimum
DFP and EVP. Listed below are the items that you can win for
each route/difficulty combination. Please note that there have been two
versions of this quest. The list below is for the second version of the
quest. |
| Enemy Counts (Approximate) |
| Enemy | Rappy Route | Zu Route | Dorphon Route |
| Sand Rappy | 60 | - | - |
| Zu | - | 15 | - |
| Dorphon | - | - | 12 |
Credit goes to Saffran for providing notes for the quest description, walkthroughs, and maps. Tycho provided the winnable item listing. Guide compiled by Ryna. |
Connect With Us