
| Introduction | |||||||||||||||||||||||||||||||||||||||||||||||||||||||||||||||||||||||||||||||||||||||||||||||||||||||||||||||||||||||||||||||||||||||||||||||||||||||||||||||||||||||||||||||
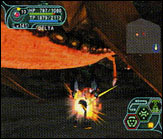
| The battle takes place in the Underground Dome of the
Forest of Ragol. Inside the high-ceilinged dome lies the enormous Dragon. Note that numbers are online#/offline# where applicable. |
|||||||||||||||||||||||||||||||||||||||||||||||||||||||||||||||||||||||||||||||||||||||||||||||||||||||||||||||||||||||||||||||||||||||||||||||||||||||||||||||||||||||||||||||
| Attacks | |||||||||||||||||||||||||||||||||||||||||||||||||||||||||||||||||||||||||||||||||||||||||||||||||||||||||||||||||||||||||||||||||||||||||||||||||||||||||||||||||||||||||||||||
|
|||||||||||||||||||||||||||||||||||||||||||||||||||||||||||||||||||||||||||||||||||||||||||||||||||||||||||||||||||||||||||||||||||||||||||||||||||||||||||||||||||||||||||||||
| Patterns | |||||||||||||||||||||||||||||||||||||||||||||||||||||||||||||||||||||||||||||||||||||||||||||||||||||||||||||||||||||||||||||||||||||||||||||||||||||||||||||||||||||||||||||||
| Dragon Above 30% HP: | |||||||||||||||||||||||||||||||||||||||||||||||||||||||||||||||||||||||||||||||||||||||||||||||||||||||||||||||||||||||||||||||||||||||||||||||||||||||||||||||||||||||||||||||
| Walk -› On Ground Fire Attack -› Flying Fire Attack -› Shockwave Landing | |||||||||||||||||||||||||||||||||||||||||||||||||||||||||||||||||||||||||||||||||||||||||||||||||||||||||||||||||||||||||||||||||||||||||||||||||||||||||||||||||||||||||||||||
| Sil Dragon Above 30% HP: | |||||||||||||||||||||||||||||||||||||||||||||||||||||||||||||||||||||||||||||||||||||||||||||||||||||||||||||||||||||||||||||||||||||||||||||||||||||||||||||||||||||||||||||||
| Walk -› On Ground Fire Attack -› Walk -› On Ground Ice Attack -› Flying Ice Attack -› Shockwave Landing | |||||||||||||||||||||||||||||||||||||||||||||||||||||||||||||||||||||||||||||||||||||||||||||||||||||||||||||||||||||||||||||||||||||||||||||||||||||||||||||||||||||||||||||||
| Dragon & Sil Dragon Below 30% HP: | |||||||||||||||||||||||||||||||||||||||||||||||||||||||||||||||||||||||||||||||||||||||||||||||||||||||||||||||||||||||||||||||||||||||||||||||||||||||||||||||||||||||||||||||
| Falling Down -› Goes Underground -› Underground Rush Attack -› Shockwave Landing -› Walk -› On Ground Fire Attack | |||||||||||||||||||||||||||||||||||||||||||||||||||||||||||||||||||||||||||||||||||||||||||||||||||||||||||||||||||||||||||||||||||||||||||||||||||||||||||||||||||||||||||||||
| Stats | |||||||||||||||||||||||||||||||||||||||||||||||||||||||||||||||||||||||||||||||||||||||||||||||||||||||||||||||||||||||||||||||||||||||||||||||||||||||||||||||||||||||||||||||
|
|||||||||||||||||||||||||||||||||||||||||||||||||||||||||||||||||||||||||||||||||||||||||||||||||||||||||||||||||||||||||||||||||||||||||||||||||||||||||||||||||||||||||||||||
| Walkthrough | |||||||||||||||||||||||||||||||||||||||||||||||||||||||||||||||||||||||||||||||||||||||||||||||||||||||||||||||||||||||||||||||||||||||||||||||||||||||||||||||||||||||||||||||
| Offensive Stratergy: | |||||||||||||||||||||||||||||||||||||||||||||||||||||||||||||||||||||||||||||||||||||||||||||||||||||||||||||||||||||||||||||||||||||||||||||||||||||||||||||||||||||||||||||||
|
Normal Strategy: Hunters: Grab a Handgun and a good Saber and/or Dagger. Use that Handgun to aim and shoot at the feet until its head comes down. Switch to either your Dagger or Saber and keep smacking the head. The Dagger might be your more powerful weapon at this point. After the Dragon gets smart and keeps its head up, use the Handgun to hit the feet and use the Saber/Dagger while it breathes fire. Rangers: Grab a Rifle and a Saber. Smack the feet with the Rifle till its head comes down. If your Saber is more powerful, use that instead on the head. After that, just gun the feet for the duration of the fight. Forces: Grab a Handgun and a Saber. Make sure you have Barta on your main configuration (when you don't have to hold down R to use it) and Zonde on your secondary configuration (when you do have to hold down R). Keep casting Barta until the head comes down. Now find out if your Saber or Barta is more powerful than the other, and continuously use it against the Dragon. When the Dragon flies up, pelter it with Zonde spells. Resume with Barta when it walks on the ground. Hard/Very Hard Offensive Strategy: Hunters: Use a Slicer! It'll hit 4 parts of the body for greater damage. Don't use Swords or Partisans. Rangers: Use a Shot! It'll hit 5 parts of the body for greater damage. Keep using it for the whole fight! Use a Rifle-type weapon if you need to. Forces: Use Gizonde! Avoid Gibarta! Gibarta wastes TP while Gizonde hits multiple areas. Ultimate Offensive Strategy:
|
|||||||||||||||||||||||||||||||||||||||||||||||||||||||||||||||||||||||||||||||||||||||||||||||||||||||||||||||||||||||||||||||||||||||||||||||||||||||||||||||||||||||||||||||
| Defensive Stratergy: | |||||||||||||||||||||||||||||||||||||||||||||||||||||||||||||||||||||||||||||||||||||||||||||||||||||||||||||||||||||||||||||||||||||||||||||||||||||||||||||||||||||||||||||||
|
At the start, run to the Dragon's flank to avoid getting stepped on.
Watch out to where you end up when you do your combo while it's moving
around. If you're under the neck/feet area you won't get hit by it's breath
weapon attack. |
|||||||||||||||||||||||||||||||||||||||||||||||||||||||||||||||||||||||||||||||||||||||||||||||||||||||||||||||||||||||||||||||||||||||||||||||||||||||||||||||||||||||||||||||
Strategies by: Reenee
 Printer Friendly Version


Connect With Us